
Bulk recipe import and export
CSV import creates or updates many recipes at once from a spreadsheet. This article is the full reference: every column, how to format each one, and what to do when a row fails.
CSV import is part of every paid plan, and development stores can use it too. CSV export is free on every plan. Compare plans on the Recipe Kit app listing.
Download the template
The quickest way to start is to download the template, fill it in with your recipes, and import it.
- Open Recipe Kit and go to Tools.
- Select CSV import.
- Click Download CSV Template.
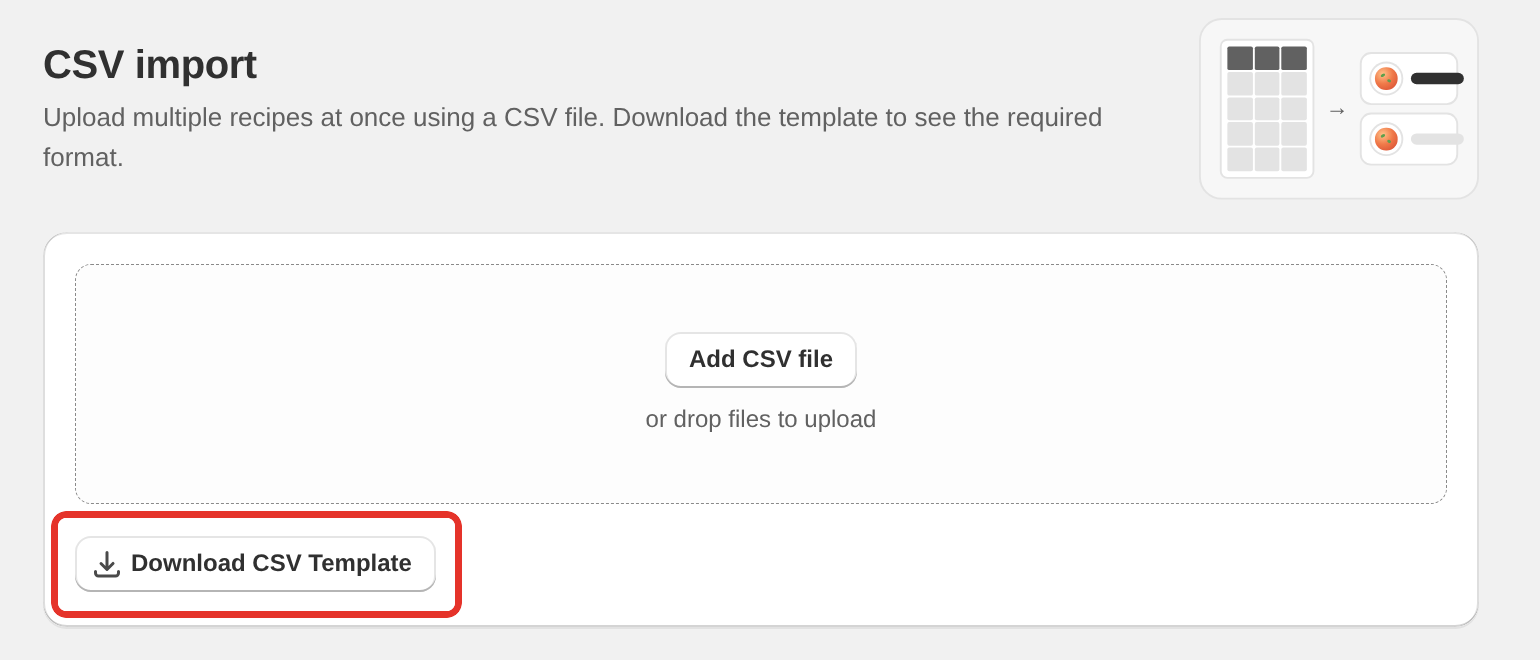
The template has a header row with every column name and one example row showing the format for each field. Open it in Google Sheets, Excel or any spreadsheet app, use the example as a reference, then delete it and add your own recipes.
Delete the example row rather than importing it. Its blog_id and article_id are placeholders that point at nothing, so the import would report that Shopify rejected the blog.
CSV column reference
Each row is one recipe. Columns can be in any order, but this is the order the template and the export use.
Required means required for a row that creates a new recipe. A file that only updates recipes you already have can leave out any column, and the recipes keep their current values for it (see Update only some columns below).
| Column | Required | Description |
|---|---|---|
| recipe_id | No | Leave empty for new recipes. Fill in an existing recipe's ID to update that recipe. |
| recipe_title | Yes | The name of the recipe. |
| recipe_author | No | Author name. |
| recipe_description | No | Full description text. |
| recipe_category | No | Category, for example "Dessert" or "Main Course". |
| recipe_cuisine | No | Cuisine, for example "Italian" or "American". |
| recipe_calories | No | Calorie count. A whole number between -32,768 and 32,767. |
| serving_size | No | Serving size text, for example "4 servings" or "24 cookies". |
| prep_time | No | Preparation time. See Time fields below. |
| cook_time | No | Cooking time. See Time fields below. |
| recipe_image | No | URL of the recipe's main image. |
| recipe_image_alt_text | No | Alt text for the main image. |
| recipe_video | No | URL of a recipe video. |
| recipe_note | No | Additional notes about the recipe. |
| faqs | No | Frequently asked questions shown under the recipe card. See FAQs below. Recipe FAQs are part of the Growth plan, and other plans ignore this column. |
| enable_rating | No | 1 to turn on star ratings, 0 to turn them off. |
| blog_id | Conditional | The Shopify blog to connect to. Exports write this as gid://shopify/Blog/106700000000. A plain numeric ID works too. Required when Create blog posts is ticked. |
| article_id | No | An existing Shopify blog post to link to. Exports write this as gid://shopify/Article/1234567890123. A plain numeric ID works too. |
| recipe_tags | No | Tags separated by semicolons. |
| recipe_ingredients | Yes | Ingredients separated by semicolons. |
| recipe_equipment | No | Equipment separated by semicolons. |
| recipe_directions | Yes | Directions separated by semicolons. |
| direction_images | No | Image URLs for direction steps. |
| nutrition_data | No | Nutrition as Title:Value pairs separated by semicolons. |
| nutrition_template | No | Nutrition label layout: linear, horizontal or vertical. Defaults to linear. |
| nutrition_serving_size | No | Nutrition serving size text, for example "Per cookie". |
| custom_field_1_key | No | Label for the first custom field. |
| custom_field_1_value | No | Value for the first custom field. |
| custom_field_2_key | No | Label for the second custom field. |
| custom_field_2_value | No | Value for the second custom field. |
| update_blog_post_tags | No | 1 to copy the recipe's tags to the linked blog post, 0 to skip. |
| update_blog_post_image | No | 1 to copy the recipe image to the linked blog post, 0 to skip. |
| status | Yes | 1 for published, 0 for hidden. A blank cell is rejected, so fill this in on every row. |
Formatting rules
Ingredients
Separate ingredients with semicolons. Each entry becomes one ingredient line.
2 cups flour;1 cup sugar;2 eggs;1 cup butter
Directions
Separate directions with semicolons. Each entry becomes one numbered step.
Preheat oven to 350F;Cream butter and sugar;Add eggs one at a time;Mix in flour;Bake for 12 minutes
Equipment
Separate equipment with semicolons.
Large mixing bowl;Whisk;Baking sheet;Parchment paper
Equipment can link to a product in your store the same way an ingredient can, with ||shopify: and the product handle (see Product links below):
Large mixing bowl;Cast iron skillet||shopify:cast-iron-skillet;Whisk
Section headings
Start an entry with HEAD: to turn it into a section heading. This works the same way in ingredients, directions and equipment.
HEAD:Dry Ingredients;2 cups flour;1 cup sugar;1 tsp baking powder;HEAD:Wet Ingredients;2 eggs;1 cup milk;1/2 cup butter
That example gives you two groups, Dry Ingredients with three items and Wet Ingredients with three items.
Directions and equipment use the same pattern:
HEAD:Preparation;Preheat oven to 350F;Grease a 9x13 pan;HEAD:Mix Batter;Cream butter and sugar;Add eggs;HEAD:Bake;Pour into pan;Bake for 30 minutes
HEAD:Mixing;Large mixing bowl;Whisk;HEAD:Baking;Baking sheet;Parchment paper
Semicolons inside an item
A semicolon starts a new item, so a semicolon you want to keep needs a backslash in front of it:
Reduce by half\; stirring often;Season to taste
If you'd rather not escape anything, use a comma instead.
Semicolons that end an HTML entity, such as & or ', never split an item, so exported recipes with apostrophes and ampersands re-import unchanged.
The same rules apply to the equipment, directions, direction_images and faqs columns. The nutrition_data column doesn't support escaping, so keep semicolons out of nutrition values.
Main image
Put a full image URL in recipe_image:
https://example.com/images/chocolate-cake.jpg
- Images already on Shopify's CDN are used as they are, without re-uploading.
- Images from other sites are downloaded and uploaded to your Shopify store.
- When you update a recipe and the image URL hasn't changed, the upload is skipped.
- If an image fails to upload, the recipe still imports, without the image.
Direction step images
Put image URLs in direction_images, separated by semicolons, in the same positions as the steps in recipe_directions. Leave a position empty for a step with no image.
https://example.com/step1.jpg;;https://example.com/step3.jpg;
Here step 1 gets step1.jpg, step 2 has no image, step 3 gets step3.jpg and step 4 has no image.
Headings count as positions too, and they always stay empty. For example, these directions have six entries, two headings and four steps:
HEAD:Prep;Preheat oven to 350F;Grease pan;HEAD:Bake;Pour batter;Bake 30 min
So direction_images needs six positions:
;;https://example.com/preheat.jpg;;;https://example.com/baking.jpg
Exports write direction images in this format already. Step images are uploaded the same way as the main image, except that if an upload fails, the original URL is kept.
Product links
Link an ingredient or a piece of equipment to a product with a double pipe (||) after its text.
Products in your store. Use shopify: followed by the product handle. The handle is the last part of the product's URL, so yourstore.com/products/organic-flour has the handle organic-flour.
2 cups flour||shopify:organic-flour;1 cup sugar;2 eggs||shopify:free-range-eggs
Recipe Kit looks up the product and attaches it, the same as linking it in the recipe editor. The ingredient or equipment links to the product page and can show the Add to Cart button. Exports write linked products on both ingredients and equipment in this shopify: format, so they survive a re-import. If a handle doesn't match a product in your store, the item imports without a link.
Any other URL. Put the full URL after the double pipe:
2 cups flour||https://yourstore.com/products/organic-flour;1 cup sugar;2 eggs
The ingredient text becomes a link to that URL. For products in your own store, use shopify: instead, because a plain URL doesn't carry variants, images or Add to Cart. Equipment takes shopify: links only, so a plain URL on equipment is dropped.
Each ingredient or piece of equipment can have only one ||. Spaces around the link are trimmed. For more on product links, see Linking products to recipes.
Tags
Separate tags with semicolons. Commas work too.
dessert;cookies;chocolate;baking;holiday
Use plain text only. HTML is stored as literal text and shows up inside the tag. If the recipe is linked to a blog post and update_blog_post_tags is 1, the tags are also written to the blog post.
Nutrition data
Write each nutrient as Title:Value, separated by semicolons:
Calories:250;Carbs:30;Fat:12;Protein:3;Sugar:18;Sodium:200
- Every entry needs a colon. An entry without one, like
Calories 250, is reported as invalid in the preview and the row is skipped. - Enter numbers only. The unit comes from the title, so write
Fat:12, notFat:12g. - A title with no value, like
Fiber:, imports as an empty value. - A title that isn't in the list below still imports and displays, but without a unit or Google recipe markup. To give it a unit, add it as a free field (see below).
- To set the % daily value shown on the label, add it as a third part ending in
%:Carbs:30:12%is 30 grams and 12% of the daily value.
| Title | Unit |
|---|---|
| Calories | calories |
| Carbs | grams |
| Fat | grams |
| Protein | grams |
| Sugar | grams |
| Fiber | grams |
| Sodium | milligrams |
| Cholesterol | milligrams |
| Saturated Fat | grams |
| Trans Fat | grams |
| Unsaturated Fat | grams |
| Iron | milligrams |
| Potassium | milligrams |
| Polyunsaturated Fat | milligrams |
| Monounsaturated Fat | milligrams |
Free fields. For a nutrient that isn't in the list, put its unit in square brackets after the name: [g], [mg] or [mcg]. These are the free fields in the recipe editor's Nutrition section.
Net Carbs [g]:6;Vitamin D [mcg]:2:10%
Exports write daily values and free fields in this format, so they survive a re-import.
The nutrition_template column sets the label layout:
| Value | Layout |
|---|---|
| linear | Minimal text |
| horizontal | Horizontal |
| vertical | Vertical (US standard label) |
Any other value falls back to linear. Use nutrition_serving_size for what the figures apply to, for example "Per cookie".
FAQs
Write each question and answer as question||answer, and separate the pairs with semicolons:
Can I freeze it?||Yes, for up to 3 months;Can I use honey?||Yes, swap it 1:1.
Escape a semicolon inside a question or answer with a backslash. An empty cell leaves a recipe's existing FAQs as they are. See Recipe FAQs.
Custom fields
Each recipe can have up to two custom fields. A value needs a key. A key with no value is fine: it shows the field's name with nothing after it, the same as leaving the value empty in the recipe editor.
| Column | Example |
|---|---|
| custom_field_1_key | Difficulty |
| custom_field_1_value | Easy |
| custom_field_2_key | Best Time |
| custom_field_2_value | Afternoon |
Time fields
prep_time and cook_time accept these formats:
| Input | Read as |
|---|---|
| 15 minutes | 15 minutes |
| 1 hour 12 minutes | 1 hour and 12 minutes |
| 2 hours | 2 hours |
| 15 | 15 minutes (a bare number is minutes) |
Blog post connections
- Link to an existing blog post. Fill in both
blog_idandarticle_id. - Create a new blog post. Fill in
blog_idonly and tick Create blog posts when you import. - No blog post. Leave both empty.
Set update_blog_post_tags and update_blog_post_image to 1 or 0 to choose whether the recipe's tags and image are copied to the linked blog post.
Recipe Kit exports blog and blog post IDs in the gid://shopify/Blog/106700000000 form on purpose. Excel treats a bare 11 to 13 digit ID as a number and rewrites it as 1.067E+11 when you save, and the real ID is lost. The gid form contains letters, so spreadsheets leave it alone. If you type IDs in yourself, use the gid form, or format the blog_id and article_id columns as Text before you paste.
Import your recipes
- Open Recipe Kit and go to Tools.
- Select CSV import.
- Drop your file on the upload area, or click Add CSV file to pick it. A file can be up to 50MB and 10,000 rows. Split a bigger collection into several files and import them one after another.
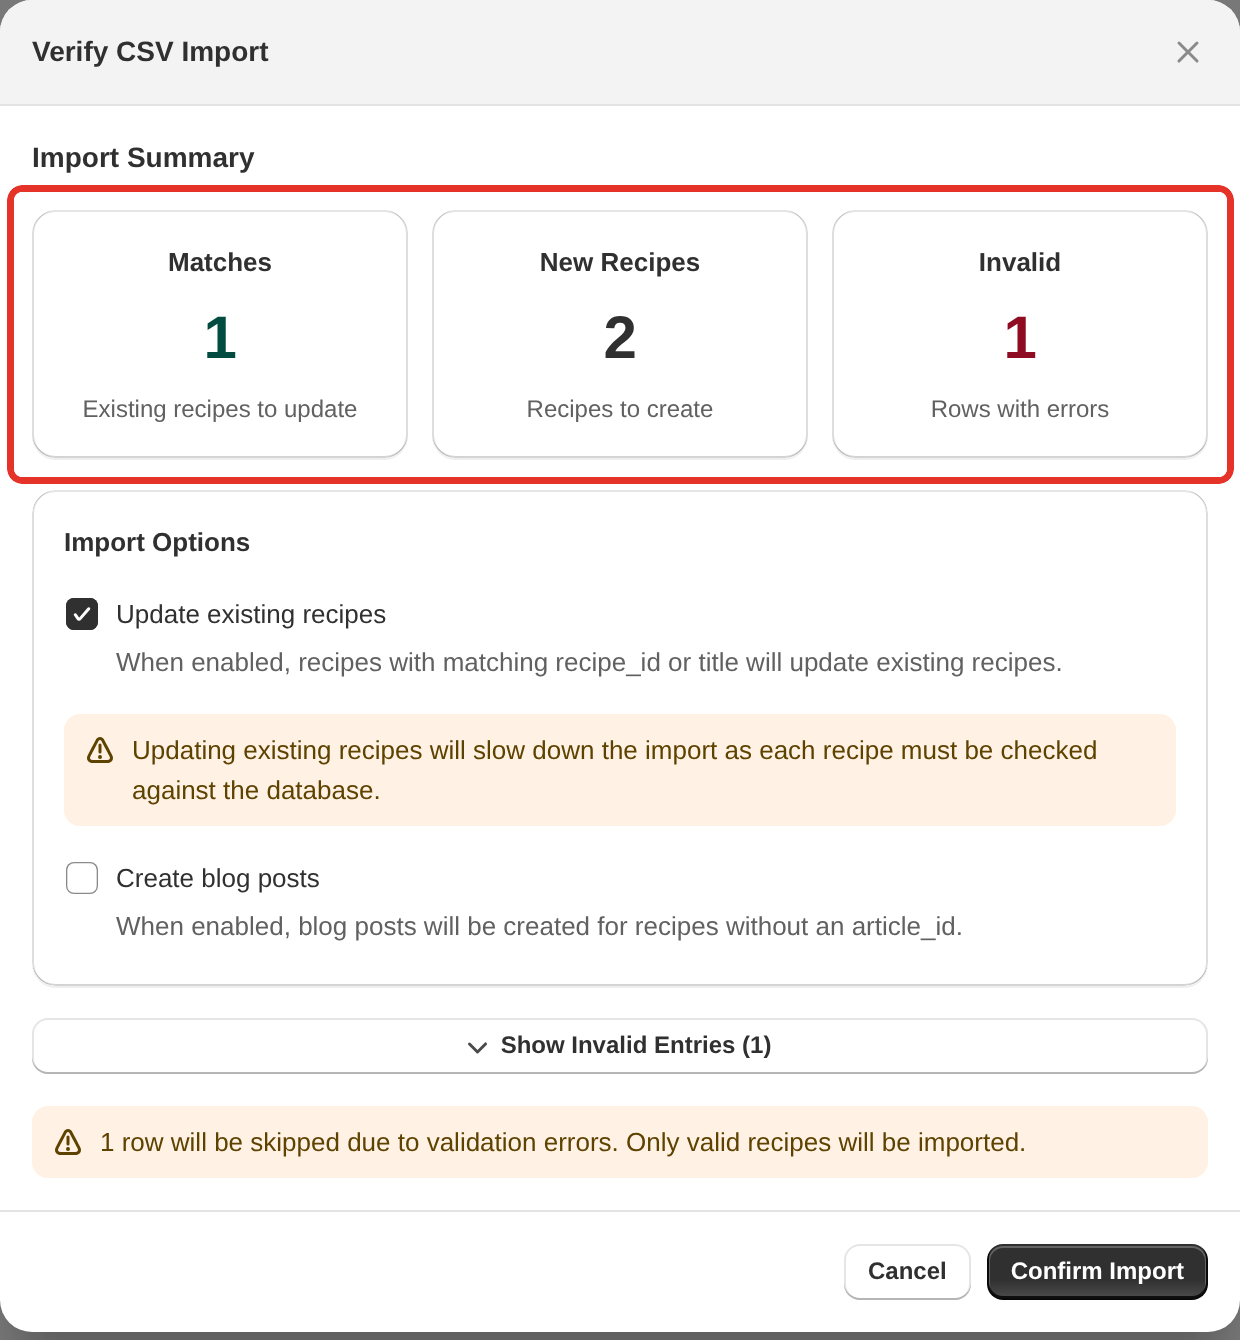
- The Verify CSV Import window shows how many rows are Matches (existing recipes), New Recipes and Invalid (rows with errors that will be skipped). Click Show Invalid Entries to see each error with its row number.
- Set the import options (see Import options below).
- Click Confirm Import.
A progress bar shows how far the import has got. The import runs in the background, so you can leave the page and come back to check on it.
Import options
The Verify CSV Import window has two options:
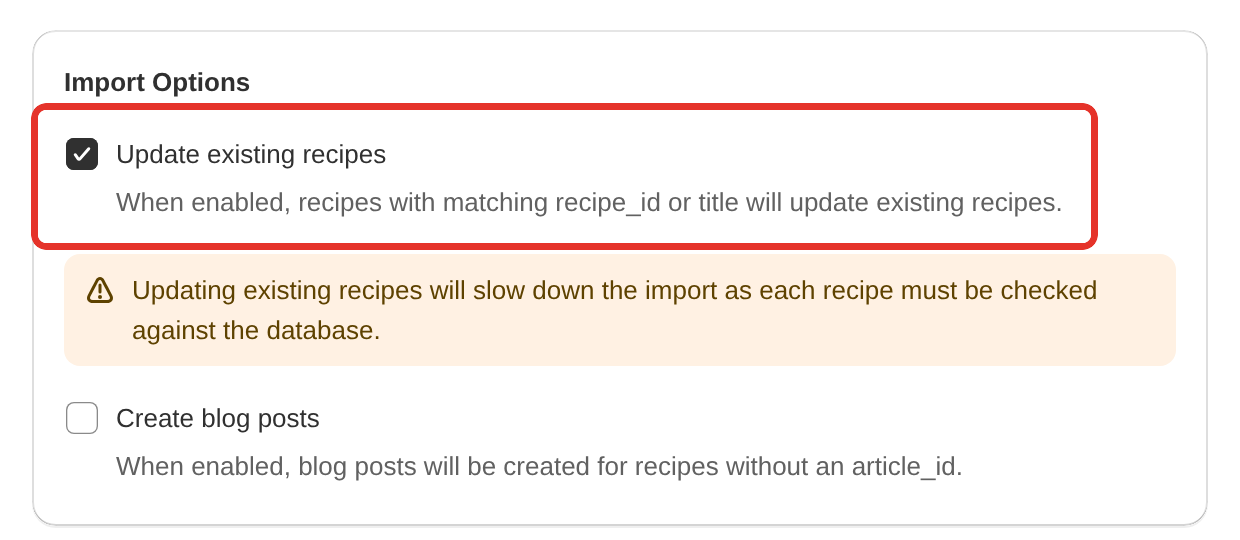
- Update existing recipes is ticked by default, and only appears when the file matches recipes you already have. Matched recipes are updated with the data in the file. Untick it and matched rows are created as new recipes instead.
- Create blog posts is off by default. Tick it and Recipe Kit creates a new Shopify blog post for every row that has a
blog_idbut noarticle_id. With it ticked, every row needs ablog_id. Creating posts makes the import slower, because Shopify limits how fast posts can be created.
How rows match existing recipes
- By recipe_id. If the row has a recipe ID that belongs to your store, it updates that recipe.
- By title. Otherwise Recipe Kit looks for one of your recipes with the same title. Capital letters don't matter.
To update recipes in bulk, export them first, edit the file and re-import it. The recipe_id column from the export makes the matching exact.
Update only some columns
You don't need every column to update recipes. Keep recipe_id (or recipe_title, to match by title) and the columns you want to change, and delete the rest. For example, a file with just recipe_id and recipe_image replaces the images and leaves everything else as it is: ingredients, product links, FAQs, tags and custom fields.
- Columns you leave out keep their current values.
- A blank cell in a column you kept clears that field on the recipe. The one exception is
faqs, where a blank cell keeps the recipe's FAQs. - The custom field columns work one at a time. A file with only
custom_field_1_keyrenames the first custom field and keeps its value and the second field.
When the file leaves columns out, the Verify CSV Import window says Only the columns in this file will change, lists the columns the file will update, and warns about any blank cells in them. Read that list before you click Confirm Import.
A file like this can only update recipes. Keep Update existing recipes ticked. A row that doesn't match a recipe you have would have to create one, and a new recipe needs every required column, so that row is skipped as invalid with a message saying why.
Stop an import
While an import runs, click Stop import. Recipes already processed stay, and nothing after them is imported.
After the import
When the import finishes, a summary lists any rows under Failed to import: and any rows that saved with a problem under Imported, but not finished:, for example a recipe that saved without its blog post. Click Download import report to get those rows as a CSV, fix them, and import them again.
Export your recipes
Tools > CSV export downloads your recipes in the same format the import reads, so you can edit the file and re-import it. For the steps, see Exporting recipes from your store.
Troubleshooting
Missing recipe_title. A recipe title is required
Every row needs a value in recipe_title. Look for empty rows, or rows where the title cell was left blank.
Invalid status. Must be 0 (hidden) or 1 (published)
status accepts only 0 or 1. A blank cell counts as missing, so fill it in on every row.
Missing blog_id (required when "Create blog posts" is enabled)
With Create blog posts ticked, every row needs a blog_id. Fill it in on every row, or untick the option.
Invalid blog_id. Must be the gid:// form the CSV export writes
The cell holds something that isn't an ID. Use the gid form from an export (gid://shopify/Blog/106700000000), or the plain number from the end of your blog's address in Shopify admin (/admin/blogs/106700000000). The same applies to article_id.
Invalid blog_id. "1.067E+11" is what a spreadsheet writes when it converts a long ID to a number
Excel read the ID as a number and saved a shortened version, and the original can't be recovered from it, so the row is rejected before the recipe is created. To fix it, do one of these:
- Download a fresh export. Its blog and blog post IDs are in the gid form, which spreadsheets don't change.
- Format the
blog_idandarticle_idcolumns as Text, then enter the IDs again.
Recipes imported before this check existed were saved without their blog post, with the warning "Saved, but no blog post was created". Re-import those rows with a correct ID and Update existing recipes ticked.
Invalid nutrition_data entry
An entry in nutrition_data is missing its colon, or has nothing before it. Each entry must read Title:Value, separated by semicolons:
Calories:250;Fat:12;Protein:3
The message quotes the entry it couldn't read, so search your file for that text.
Only one || delimiter allowed per ingredient (or per item)
An ingredient or a piece of equipment has more than one ||. Each can have only one link. Look for an accidental extra double pipe.
Custom field 1: custom_field_1_value needs a custom_field_1_key
The row has a value for custom field 1 but no key. Add the key, or clear the value. The same goes for custom field 2.
This file only has some recipe columns, so it can only update recipes that already exist
The file leaves columns out, and this row would create a new recipe. The message says which of these happened:
- Update existing recipes is unticked. Tick it.
- "No recipe with recipe_id ... was found" or "No recipe titled ... was found". Neither the row's
recipe_idnor its title matched one of your recipes. Recipe Kit tries the title when the ID isn't found, so check the title's spelling too.
To create new recipes, use a file with every required column.
Calories don't import, or a row fails on calories
recipe_calories takes whole numbers from -32,768 to 32,767. Text, commas and decimals are ignored and the recipe imports with no calorie count. A number outside the range fails the row.
Missing recipe_ingredients. At least one ingredient is required
recipe_ingredients can't be empty. Add at least one ingredient.
Missing recipe_directions. At least one direction is required
recipe_directions can't be empty. Add at least one step.
Product links don't work after import
- Check the handle. It's the last part of the product URL, like
organic-flourfromyourstore.com/products/organic-flour. - The product must exist in your store. A handle that matches nothing imports without a link.
- Check the format is exactly
shopify:handleafter the||, for example2 cups flour||shopify:organic-flour. Don't put the full URL aftershopify:.
Step images don't show after import
- Check the positions in
direction_imagesline up withrecipe_directions, including headings, which take an empty position. - Both columns should have the same number of semicolons.
- The image URLs must be public.
Images don't show after import
- Check the image URLs open in a browser without a login.
- A failed upload doesn't stop the recipe importing. The recipe imports without the image. Fix the URL and re-import, or add the image in the recipe editor.
The import is slow
Recipe Kit pauses briefly between recipes so it doesn't overload Shopify: about 150ms between recipes and 500ms after every 25. Image uploads add time to each recipe, so a file with thousands of recipes can take a while. You can leave the page. Come back to Tools > CSV import to see progress.
Odd characters after import
- Save the file with UTF-8 encoding. In Excel, choose CSV UTF-8 (Comma delimited) when you save.
- Wrap values that contain commas, double quotes or line breaks in double quotes. Most spreadsheet apps do this for you.
I stopped an import but some recipes were created
Stopping an import doesn't undo recipes that were already created or updated. Delete the ones you don't want from the Recipes page.
What's next
- Exporting recipes from your store covers downloading your recipes as a CSV.
- Transfer recipes to another Shopify store covers copying recipes between stores with export and import.
- Linking blog posts to recipes covers connecting imported recipes to posts.